
Kali ini giliran widget Related Post yang bisa dilakukan setting atau kustomisasi dari menu Layout/Tata Letak Blogger. Dengan menerapkan tutorial ini, maka pengguna template disuguhkan setidaknya terdapat 3 style opsional widget Related Posts yang bisa dinavigasi langsung pada menu Layout Blogspot.

Secara keseluruhan, adapun fitur yang dapat dikustomisasi dari widget Related Posts (Artikel Terkait) pada menu Layout adalah sebagai berikut:
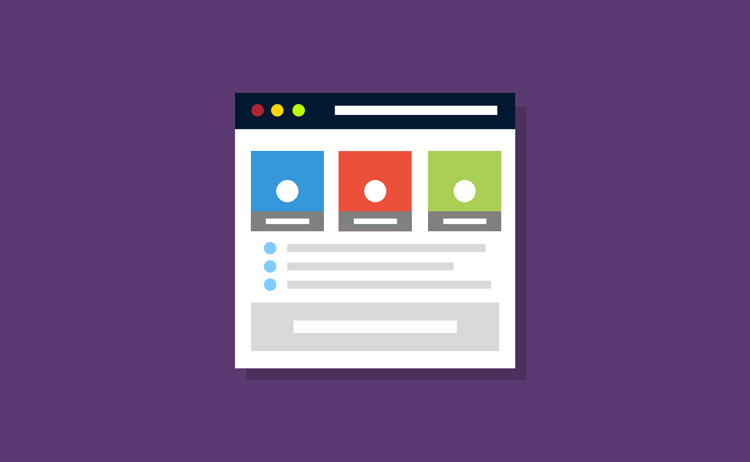
Contoh tampilan widget pada menu Layout/Tata Letak seperti pada gambar berikut:

Style 1

Style 2

Style 3

Langkah 1
Masuk ke Theme > Edit HTML
Langkah 2
Letakkan kode berikut ini di atas kode
Langkah 3
Temukan kode
Langkah 4
Ganti JavaScript widget Related Post Anda sebelumnya dengan kode berikut ini:
Langkah 5
Saatnya memperbaiki tampilan setiap style widget Related Posts, cari kode
Langkah 6
Saatnya mempercantik tampilan Layout untuk widget Related Post dengan memberi sentuhan warna-warni. Caranya, cari kode berikut:
Lalu letakkan kode berikut ini di bawah kode tadi:
Ikuti tutorial tentang Cara Mewarnai Layout atau Tata Letak Blogger jika Anda tertarik mewarnai setiap section atau widget template Anda di Layout.
Langkah 7
Simpan Tema
Langkah 8
Silahkan akses menu Layout atau Tata Letak, scroll ke bawah, lalu edit pada masing-masing widget Related Post Setting yang ada disitu (desktop dan mobile), dengan catatan sebagai berikut:
Sebetulnya widget Related Posts atau Artikel Terkait ini masih bisa ditambahkan style lainnya, yaitu bisa sampai 6 style. Kemungkinan akan di update dilain waktu. Demikian, semoga bermanfaat!
Secara keseluruhan, adapun fitur yang dapat dikustomisasi dari widget Related Posts (Artikel Terkait) pada menu Layout adalah sebagai berikut:
- Terdapat 3 pilihan style atau model tampilan widget.
- Bisa mengatur jumlah post yang ingin ditampilkan pada widget.
- Bisa mengatur jumlah karakter yang ingin ditampilkan pada summary (post snippet), khusus style 2.
- Sudah responsive.
- Dapat mengubah judul/title widget.
- Terdapat navigasi khusus untuk masing-masing perangkat, desktop/tablet dan mobile.
- Gambar atau thumbnail widget Related Posts tidak gepeng (stretch).
Contoh tampilan widget pada menu Layout/Tata Letak seperti pada gambar berikut:
Style 1
Style 2
Style 3
Cara memasang widget Related Posts yang bisa customization langsung dari menu Layout atau Tata Letak Blogger
Langkah 1
Masuk ke Theme > Edit HTML
Langkah 2
Letakkan kode berikut ini di atas kode
</main><div class='related-posts-widget' id='related-posts-widget'>
<div class='notex'/>
<b:section class='relatedPost' id='related-post-set-desktop' maxwidgets='1' name='Related Post Setting (Desktop & Tablet)' preferred='yes' showaddelement='no'>
<b:widget id='HTML745' locked='true' title='Related Post' type='HTML' version='1'>
<b:widget-settings>
<b:widget-setting name='content'>numPosts:6,
widgetStyle:3,
summaryLength:101,</b:widget-setting>
</b:widget-settings>
<b:includable id='main'>
<!-- only display title if it's non-empty -->
<b:if cond='data:title != ""'>
</b:if>
<div class='widget-content'>
<script type='text/javascript'>
var mql = window.matchMedia('screen and (min-width: 479px)');if (mql.matches){
var relatedPostConfig={homePage:"<data:blog.homepageUrl/>",widgetTitle:"<h4><data:title/></h4>",titleLength:"auto",thumbnailSize:322,noImage:"data:image/png;base64,iVBORw0KGgoAAAANSUhEUgAAAAEAAAABCAIAAACQd1PeAAAAA3NCSVQICAjb4U/gAAAADElEQVQImWOor68HAAL+AX7vOF2TAAAAAElFTkSuQmCC",containerId:"related-post",newTabLink:false,moreText:"Read More",<data:content/>callBack:function(){}}}
</script>
</div>
</b:includable>
</b:widget>
</b:section>
<b:section class='relatedPost' id='related-post-set-mobile' maxwidgets='1' mobile='yes' name='Related Post Setting (Mobile)' preferred='yes' showaddelement='no'>
<b:widget id='HTML746' locked='true' title='Related Post' type='HTML' version='1'>
<b:widget-settings>
<b:widget-setting name='content'>numPosts:5,
widgetStyle:1,
summaryLength:60,</b:widget-setting>
</b:widget-settings>
<b:includable id='main'>
<!-- only display title if it's non-empty -->
<b:if cond='data:title != ""'>
</b:if>
<div class='widget-content'>
<script type='text/javascript'>
var mql = window.matchMedia('screen and (max-width: 480px)');if (mql.matches){
var relatedPostConfig={homePage:"<data:blog.homepageUrl/>",widgetTitle:"<h4><data:title/></h4>",titleLength:"auto",thumbnailSize:322,noImage:"data:image/png;base64,iVBORw0KGgoAAAANSUhEUgAAAAEAAAABCAIAAACQd1PeAAAAA3NCSVQICAjb4U/gAAAADElEQVQImWOor68HAAL+AX7vOF2TAAAAAElFTkSuQmCC",containerId:"related-post",newTabLink:false,moreText:"Read More",<data:content/>callBack:function(){}}}
</script>
</div>
</b:includable>
</b:widget>
</b:section>
</div>Perhatian:
Sebetulnya kode tersebut bisa diletakkan dimana saja, asalkan tidak di dalam Blog1 atau
Sebetulnya kode tersebut bisa diletakkan dimana saja, asalkan tidak di dalam Blog1 atau
b:section dan masih di dalam kode <body>. Anda juga bisa meletakkannya di atas kode <aside id='sidebar-wrapper’> atau yang mirip dengannya.Langkah 3
Temukan kode
<data:post.body/> (khusus untuk postingan) atau kode <div class='post-footer'> lalu letakkan kode berikut di bawah kode tadi:<b:if cond='data:blog.pageType == "item"'>
<div class='related-wrapper' id='related-wrapper'>
<div class='related-post' id='related-post'/>
<script type='text/javascript'>
var labelArray = [<b:if cond='data:post.labels'><b:loop values='data:post.labels' var='label'>"<data:label.name/>"<b:if cond='data:label.isLast != "true"'>,</b:if></b:loop></b:if>];
</script>
</div>
</b:if>Langkah 4
Ganti JavaScript widget Related Post Anda sebelumnya dengan kode berikut ini:
<script type='text/javascript'>
//<![CDATA[
var randomRelatedIndex,showRelatedPost;(function(n,m,k){var d={widgetTitle:"<h4>Related Posts:</h4>",widgetStyle:1,homePage:"http://www.dte.web.id",numPosts:7,summaryLength:125,titleLength:"auto",thumbnailSize:200,noImage:"data:image/png;base64,iVBORw0KGgoAAAANSUhEUgAAAAEAAAABCAIAAACQd1PeAAAAA3NCSVQICAjb4U/gAAAADElEQVQImWOor68HAAL+AX7vOF2TAAAAAElFTkSuQmCC",containerId:"related-post",newTabLink:false,moreText:"Baca Selengkapnya",callBack:function(){}};for(var f in relatedPostConfig){d[f]=(relatedPostConfig[f]=="undefined")?d[f]:relatedPostConfig[f]}var j=function(a){var b=m.createElement("script");b.type="text/javascript";b.src=a;k.appendChild(b)},o=function(b,a){return Math.floor(Math.random()*(a-b+1))+b},l=function(a){var p=a.length,c,b;if(p===0){return false}while(--p){c=Math.floor(Math.random()*(p+1));b=a[p];a[p]=a[c];a[c]=b}return a},e=(typeof labelArray=="object"&&labelArray.length>0)?"/-/"+l(labelArray)[0]:"",h=function(b){var c=b.feed.openSearch$totalResults.$t-d.numPosts,a=o(1,(c>0?c:1));j(d.homePage.replace(/\/$/,"")+"/feeds/posts/summary"+e+"?alt=json-in-script&orderby=updated&start-index="+a+"&max-results="+d.numPosts+"&callback=showRelatedPost")},g=function(z){var s=document.getElementById(d.containerId),x=l(z.feed.entry),A=d.widgetStyle,c=d.widgetTitle+'<ul class="related-post-style-'+A+'">',b=d.newTabLink?' target="_blank"':"",y='<span class="bg_overlay"></span>',v,t,w,r,u;if(!s){return}for(var q=0;q<d.numPosts;q++){if(q==x.length){break}t=x[q].title.$t;w=(d.titleLength!=="auto"&&d.titleLength<t.length)?t.substring(0,d.titleLength)+"…":t;r=("media$thumbnail"in x[q]&&d.thumbnailSize!==false)?x[q].media$thumbnail.url.replace(/.*?:\/\//g , "//").replace(/\/s[0-9]+(\-c)?/, "/s"+d.thumbnailSize):d.noImage;u=("summary"in x[q]&&d.summaryLength>0)?x[q].summary.$t.replace(/<br ?\/?>/g," ").replace(/<.*?>/g,"").replace(/[<>]/g,"").substring(0,d.summaryLength)+"…":"";for(var p=0,a=x[q].link.length;p<a;p++){v=(x[q].link[p].rel=="alternate")?x[q].link[p].href:"#"}if(A==2){c+='<li><div class="related-post-item-thumbnail"><img alt="" src="'+r+'" width="'+d.thumbnailSize+'" height="'+d.thumbnailSize+'"></div><div class="related-post-item-text"><a class="related-post-item-title" title="'+t+'" href="'+v+'"'+b+">"+w+'</a><span class="related-post-item-summary"><span class="related-post-item-summary-text">'+u+'</span> <a href="'+v+'" class="related-post-item-more"'+b+">"+d.moreText+"</a></span></div>"+y+"</li>"}else{if(A==3||A==4){c+='<li class="related-post-item" tabindex="0"><a class="related-post-item-title-thumb" href="'+v+'"'+b+'><div class="related-post-item-thumbnail"><img alt="" src="'+r+'" width="'+d.thumbnailSize+'" height="'+d.thumbnailSize+'"></a></div><div class="related-post-item-tooltip"><a class="related-post-item-title" title="'+t+'" href="'+v+'"'+b+">"+w+"</a><span>"+u+"</span></div>"+y+"</li>"}else{if(A==5){c+='<li class="related-post-item" tabindex="0"><a class="related-post-item-wrapper" href="'+v+'" title="'+t+'"'+b+'><div class="related-post-item-thumbnail"><img alt="" src="'+r+'" width="'+d.thumbnailSize+'" height="'+d.thumbnailSize+'"><span class="related-post-item-tooltip">'+w+"</span></a>"+y+"</li>"}else{if(A==6){c+='<li><div class="related-post-item-tooltip"><div class="related-post-item-thumbnail"><img alt="" src="'+r+'" width="'+d.thumbnailSize+'" height="'+d.thumbnailSize+'"></div><a class="related-post-item-title" title="'+t+'" href="'+v+'"'+b+">"+w+'</a><span class="related-post-item-summary"><span class="related-post-item-summary-text">'+u+"</span></span>"+y+"</div></li>"}else{c+='<li><a title="'+t+'" href="'+v+'"'+b+">"+w+"</a></li>"}}}}}s.innerHTML=c+="</ul>"+y;d.callBack()};randomRelatedIndex=h;showRelatedPost=g;j(d.homePage.replace(/\/$/,"")+"/feeds/posts/summary"+e+"?alt=json-in-script&orderby=updated&max-results=0&callback=randomRelatedIndex")})(window,document,document.getElementsByTagName("head")[0]);
//]]>
</script>Langkah 5
Saatnya memperbaiki tampilan setiap style widget Related Posts, cari kode
</style> lalu letakkan CSS berikut di atas kode tadi:/* CSS Related Post */
#related-wrapper{margin:20px auto 0;padding:0;display:block;overflow:hidden;}
.related-post{font-family:'Poppins', sans-serif;margin:0 auto;padding:0;text-align:center}
.related-post h4{margin:5px 0 15px 0;font-size: 15px;line-height: 1.2em;padding: 0 15px;position: relative;color: #292828;font-weight: 700;text-align:center;text-transform: uppercase;background-color:#fff;display:inline-block}
.related-post h4:before{display: block;width: 500px;height: 0;border-bottom:1px solid #ddd;position: absolute;right: 100%;left: auto;top: 50%;content: "";}
.related-post h4:after{display: block;width: 500px;height: 0;border-bottom:1px solid #ddd;position: absolute;left: 100%;right: auto;top: 50%;content: "";}
.related-post .related-post-style-1,.related-post .related-post-style-2,.related-post .related-post-style-3{-moz-box-sizing:border-box;-webkit-box-sizing:border-box;box-sizing:border-box;display:-webkit-box;display:-webkit-flex;display:flex;-webkit-flex-wrap:wrap;-ms-flex-wrap:wrap;flex-wrap: wrap;}
.related-post .related-post-item-summary,.related-post-style-3 span{font-size:83%;color:#656565;line-height:1.4em;display:inline-block;text-align:left}
/* Related Post Style 3 */
.related-post-style-3{margin:0 0 0 -1%!important;}
.related-post-style-3 li{list-style:none;margin-left:1%!important;padding:0;width:calc(33.3333% - 1%);float:left;}
.related-post-style-3 .related-post-item-thumbnail{display: flex;align-items: center;justify-content: center;width:100%;height:125px;padding:0;margin:0 auto 8px;overflow:hidden;}
.related-post-style-3 li img{width:100%;height:auto;}
.related-post-style-3 a.related-post-item-title{display:block;text-align:left;overflow:hidden;line-height:1.3em;font-size:100% !important;color:#111;margin:0 auto 15px}
.related-post-style-3 a:hover.related-post-item-title{text-decoration:underline}
.related-post-style-3 span{display:none!important;height:0;width:0;overflow:hidden} // this is summary
/* Related Post Style 2 */
.related-post-style-2{margin:0 auto!important;}
.related-post-style-2 li{list-style:none;margin:0 auto 10px;padding:10px 0 0;display:block;width:100%;border-top:1px solid #eee}
.related-post-style-2 li:first-child {border-top:none}
.related-post-style-2 .related-post-item-thumbnail{display: flex;align-items: center;justify-content: center;margin:0 auto;width:125px;height:80px;max-width:none;max-height:none;padding:0;overflow:hidden;display:inline-block;float:left}
.related-post-style-2 .related-post-item-thumbnail img{width:100%;height:100%}
.related-post-style-2 a.related-post-item-title{line-height:1.3em;display:block;text-align:left;font-size:107% !important;color:#2d2d2d;margin:0 0 7px;font-weight:700}
.related-post-style-2 a:hover.related-post-item-title{text-decoration:underline}
.related-post-style-2 a.related-post-item-more{display:none}
.related-post-style-2 .related-post-item-text{display:inline-block;text-align:left;width:calc(100% - 140px);float:right;}
/* Related Post Style 1 */
.related-post-style-1 li a{line-height:1.3em;display:block;position:relative;font-size:100% !important;color:#2d2d2d;margin:0 0 7px;padding:0 0 0 28px;font-weight:400}
.related-post-style-1 li a:before{content:'';width:7px;height:7px;border-radius:100%;background-color:#08AADB;display:inline-block;position:absolute;top:6px;left:7px}
.related-post-style-1 li a:hover{text-decoration:underline}
/* Related Posts Responsive */
@media screen and (max-width:600px){
.related-post-style-3 .related-post-item-thumbnail{height:110px;}
}
@media screen and (max-width:480px){
.related-post-style-2 a.related-post-item-title{line-height:1.2em;font-size:100% !important;margin:0 0 5px;}
.related-post-style-3 .related-post-item-thumbnail{height:75px;}
.related-post-style-3 a.related-post-item-title{line-height:1.2em;font-size:95% !important;margin:0 auto 9px}
.related-post .related-post-item-summary,.related-post-style-3 span{font-size:79%;}
}
@media screen and (max-width:320px){
.related-post-style-1 li a{line-height:1.2em;}
.related-post-style-3{margin:0 auto!important;}
.related-post-style-3 li{margin:0 auto 20px!important;padding:0;width:100%;float:none;}
.related-post-style-3 li img{display: flex;align-items:center;}
.related-post-style-3 .related-post-item-thumbnail{height:auto;margin:0 auto 8px;}
.related-post-style-3 a.related-post-item-title{line-height:1.3em;font-size:100%!important}
}Langkah 6
Saatnya mempercantik tampilan Layout untuk widget Related Post dengan memberi sentuhan warna-warni. Caranya, cari kode berikut:
<b:template-skin>

<![CDATA[
Lalu letakkan kode berikut ini di bawah kode tadi:
body#layout #related-posts-widget{visibility:visible!important;display:block!important;padding:15px 9px 5px;background-color:#673e7d;box-sizing: border-box;}

body#layout #related-posts-widget:before, body#layout .notex:before, body#layout .notex:after{

color: #8a6d3b;background-color: #fcf8e3;border-color: #faebcc;display: block;margin:0 5px 5px;padding: 5px 10px;box-sizing: border-box;font-size: 14px;font-weight: normal;border-radius: 3px;text-align:left!important}

body#layout #related-posts-widget:before{content: 'Angka untuk kode numPosts adalah "1 - terserah"';}

body#layout .notex:before{content: 'Angka untuk kode widgetStyle adalah "1, 2, atau 3"';}

body#layout .notex:after{content: 'Angka untuk kode summaryLength adalah "0 - terserah". (khusus style 2)';}

body#layout #related-posts-widget .section > h4{margin-left:0!important}

#layout #related-post-set-desktop {background:#5ebf79!important;border:none!important}

#layout #related-post-set-mobile {background:#5ebf79!important;border:none!important}
Perhatian:
Jika pada template Anda tidak ada kode
Jika pada template Anda tidak ada kode
<b:template-skin>, Anda bisa letakkan CSS tersebut di atas kode ]]></b:skin>. Hanya saja tampilan Related Posts di layout menjadi tidak berwarna.Ikuti tutorial tentang Cara Mewarnai Layout atau Tata Letak Blogger jika Anda tertarik mewarnai setiap section atau widget template Anda di Layout.
Langkah 7
Simpan Tema
Langkah 8
Silahkan akses menu Layout atau Tata Letak, scroll ke bawah, lalu edit pada masing-masing widget Related Post Setting yang ada disitu (desktop dan mobile), dengan catatan sebagai berikut:
- Untuk kode
numPostsisi dengan angka 1 – terserah. - Untuk kode
widgetStyleisi dengan angka 1, 2 atau 3. - Untuk kode
summaryLengthisi dengan angka 0 – terserah.
Catatan!
- Ini adalah modifikasi widget Related Posts DTE :], yang JavaScriptnya sedikit dikonfigurasi. Jadi pastikan Anda melakukan Langkah 4.
- Jika Anda mencoba menerapkan widget ini tetapi tidak mengikuti seluruh rangkaian yang ditutorialkan di atas dengan benar, maka dapat dipastikan pemasangannya akan gagal total.
Sebetulnya widget Related Posts atau Artikel Terkait ini masih bisa ditambahkan style lainnya, yaitu bisa sampai 6 style. Kemungkinan akan di update dilain waktu. Demikian, semoga bermanfaat!
3 komentar
https://www.blogger.com/profile/099162081321661720982019-09-12T21:50:00+07:00https://www.blogger.com/profile/09916208132166172098ada notif itu pas di save bang...
https://www.blogger.com/profile/122019551818168050862019-09-12T21:50:00+07:00https://www.blogger.com/profile/12201955181816805086https://www.blogger.com/profile/159231594206175502872019-09-12T21:50:00+07:00https://www.blogger.com/profile/15923159420617550287Image.pre,code, atauquote.Salin Kode!lalu paste ke kolom komentar.image quote pre code